
[置顶] 泰晓 RISC-V 实验箱,配套 30+ 讲嵌入式 Linux 系统开发公开课
Linux Lab:难以抗拒的十大理由 V2.0
Wu Zhangjin 创作于 2020/05/15
By Falcon of TinyLab.org May 15, 2020
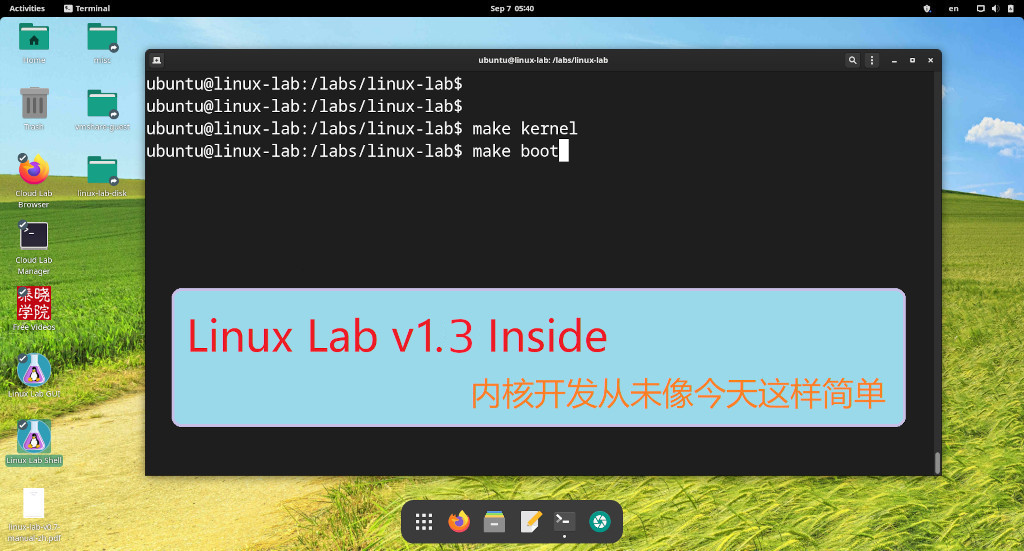
Linux Lab 是一套用于 Linux 内核学习、开发和测试的即时实验室,可以极速搭建和使用,功能强大,用法简单!
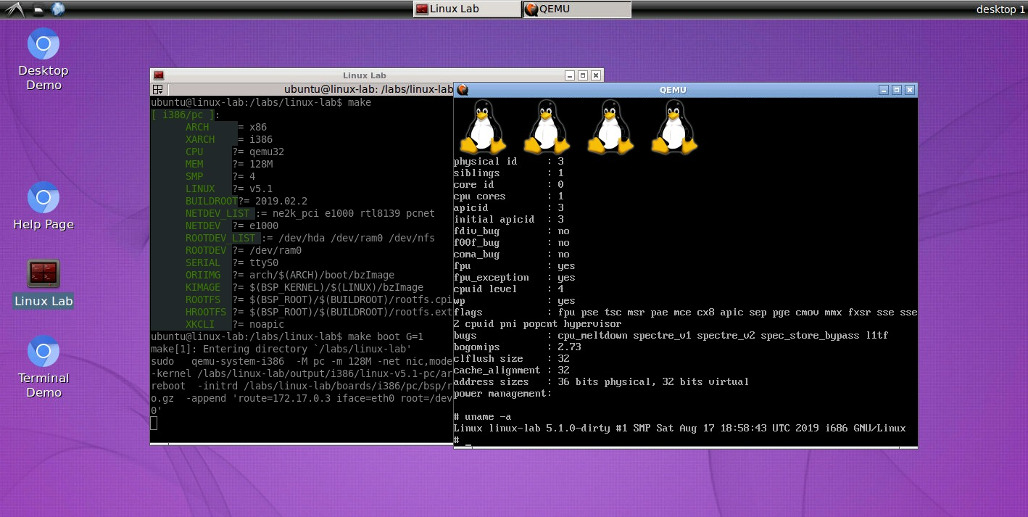
经过 3 年多的开发与迭代,Linux Lab 已经发布了 v0.4 rc3 版,其易用性和功能逐渐强大,非常推荐各位 Linux 内核和嵌入式 Linux 开发者尝试。
下面列举了十大使用 Linux Lab 的案例。
学习 C 语言
安装完以后,如果选择 bash 登陆方式,会立即进入到 Linux 命令行。
C 语言开发
里头已经安装好了必备的编辑器 vim 和编译器 gcc,可以直接上手 C 语言开发。
$ tools/docker/bash linux-lab
ubuntu@linux-lab:/labs/linux-lab$ cd examples/c/hello/
ubuntu@linux-lab:/labs/linux-lab/examples/c/hello$ gcc -o hello hello.c
hello.c  Makefile  README.md
ubuntu@linux-lab:/labs/linux-lab/examples/c/hello$ ./hello
Hello, World!
简单 C 语言工程管理 Makefile
另外,里面已经提供了一个简单的 Makefile 例子,可以直接通过 make 生成 hello.i, hello.s 和 hello.o。
ubuntu@linux-lab:/labs/linux-lab/examples/c/hello$ make hello.i
ubuntu@linux-lab:/labs/linux-lab/examples/c/hello$ make hello.s
ubuntu@linux-lab:/labs/linux-lab/examples/c/hello$ make hello.o
在这个基础上,结合任何一本经典的 C 语言书籍,就可以学习基本的语法、算法和 Posix API 用法了。
学习汇编语言和处理器指令集
Linux Lab 不只准备了 x86 的 gcc 编译器,而且准备了其他几大主流处理器架构的编译器,学习各种架构编译器不在话下,而且可以立即使用 qemu 来执行。
X86 汇编
先来看一段 x86 的汇编:
$ tools/docker/bash linux-lab
ubuntu@linux-lab:/labs/linux-lab$ cd examples/assembly/
ubuntu@linux-lab:/labs/linux-lab/examples/assembly$ ls
aarch64  arm  mips64el  mipsel  powerpc  powerpc64  README.md  riscv32  riscv64  x86  x86_64
ubuntu@linux-lab:/labs/linux-lab/examples/assembly/x86$ make
as --32 -o x86-hello.o x86-hello.s
ld -m elf_i386 -o x86-hello x86-hello.o
/labs/linux-lab/examples/assembly/x86/x86-hello
Hello, world!
ubuntu@linux-lab:/labs/linux-lab/examples/assembly/x86$ cat x86-hello.s
.data                   # section declaration
msg:
    .string "Hello, world!\n"
    len = . - msg   # length of our dear string
.text                   # section declaration
                        # we must export the entry point to the ELF linker or
    .global _start      # loader. They conventionally recognize _start as their
                        # entry point. Use ld -e foo to override the default.
_start:
# write our string to stdout
    movl    $len,%edx   # third argument: message length
    movl    $msg,%ecx   # second argument: pointer to message to write
    movl    $1,%ebx     # first argument: file handle (stdout)
    movl    $4,%eax     # system call number (sys_write)
    int     $0x80       # call kernel
# and exit
    movl    $0,%ebx     # first argument: exit code
    movl    $1,%eax     # system call number (sys_exit)
    int     $0x80       # call kernel
ARM 汇编
arm 的也不在话下:
ubuntu@linux-lab:/labs/linux-lab/examples/assembly/arm$ cat arm-hello.s
.data
msg:
    .ascii      "Hello, ARM!\n"
len = . - msg
.text
.globl _start
_start:
    /* syscall write(int fd, const void *buf, size_t count) */
    mov     %r0, $1     /* fd -> stdout */
    ldr     %r1, =msg   /* buf -> msg */
    ldr     %r2, =len   /* count -> len(msg) */
    mov     %r7, $4     /* write is syscall #4 */
    swi     $0          /* invoke syscall */
    /* syscall exit(int status) */
    mov     %r0, $0     /* status -> 0 */
    mov     %r7, $1     /* exit is syscall #1 */
    swi     $0          /* invoke syscall */
ubuntu@linux-lab:/labs/linux-lab/examples/assembly/arm$ make
arm-linux-gnueabi-as -o arm-hello.o arm-hello.s
arm-linux-gnueabi-ld -o arm-hello arm-hello.o
Hello, ARM!
RISC-V 汇编
其他架构也可以类似使用,有个别架构,比如 RISC-V,需要先切到 Linux Lab 根目录下载工具链:
$ tools/docker/bash linux-lab
ubuntu@linux-lab:/labs/linux-lab$
ubuntu@linux-lab:/labs/linux-lab$ make BOARD=riscv64/virt
[ riscv64/virt ]:
     ARCH = riscv
     XARCH = riscv64
     CPU = any
     SMP = 4
     MEM = 1024M
     QEMU = v4.0.0
     QEMU_US = 1
     LINUX = v5.1
     BUILDROOT = 2019.05
     NETDEV_LIST = virtio
     NETDEV = virtio
     SERIAL = ttyS0
     NET9PDEV = virtio-9p-device
     ROOTDEV_LIST = /dev/vda /dev/ram0 /dev/nfs
     ROOTDEV = /dev/vda
     FSTYPE = ext2
     PORIIMG = fw_jump.elf
     PKIMAGE = /labs/linux-lab/boards/riscv64/virt/bsp/kernel/v5.1/fw_jump.elf
     KRN_ADDR = 0x80200000
     ORIIMG = arch/riscv/boot/Image
     KIMAGE = /labs/linux-lab/output/riscv64/linux-v5.1-virt/arch/riscv/boot/Image
     ROOTFS = /labs/linux-lab/boards/riscv64/virt/bsp/root/2019.05/rootfs.cpio.gz
     HROOTFS = /labs/linux-lab/boards/riscv64/virt/bsp/root/2019.05/rootfs.ext2
     QTOOL = /labs/linux-lab/boards/riscv64/virt/bsp/qemu/v4.0.0/bin/qemu-system-riscv64
     CCORI = gnu-mcu-eclipse

ubuntu@linux-lab:/labs/linux-lab$ make bsp

Downloading bsp source ...

Previous HEAD position was c6c47f0... README: Update usage
HEAD is now at e2963d2... buildroot: 2019.05: speed up root building
ubuntu@linux-lab:/labs/linux-lab$ make toolchain

[ gnu-mcu-eclipse 8.2.0-2.2-20190521-0004 ]:

Remote.: https://github.com/gnu-mcu-eclipse/riscv-none-gcc/releases/download/v8.2.0-2.2-20190521/gnu-mcu-eclipse-riscv-none-gcc-8.2.0-2.2-20190521-0004-centos64.tgz
Local..: /labs/linux-lab/prebuilt/toolchains/riscv64/gnu-mcu-eclipse/riscv-none-gcc/8.2.0-2.2-20190521-0004/bin
Tool...: riscv-none-embed-gcc
Version: riscv-none-embed-gcc (GNU MCU Eclipse RISC-V Embedded GCC, 64-bit) 8.2.0
之后同样可以使用:
ubuntu@linux-lab:/labs/linux-lab$ cd examples/assembly/riscv32
ubuntu@linux-lab:/labs/linux-lab/examples/assembly/riscv32$ make
... riscv-none-embed-as -o riscv32-hello.o riscv32-hello.s
... riscv-none-embed-ld -o riscv32-hello riscv32-hello.o
Hello Risc-V
免费使用某块虚拟开发板
7 大架构 + 16 块板子
Linux Lab 已经集成了 7 大架构的 16 块开发板,平均每个架构支持两款以上。常用的开发板基本都有了,包括 32 位和 64 位架构基本可以任选。
所有的板子都有:
- 编译好的 Qemu 的模拟器
- 编译好的 文件系统以及配置文件
- 编译好的 内核镜像、dtb 以及配置文件
- 可直接启动到串口的 Qemu 启动脚本
所有仓库都可以单独下载,可以在 Linux Lab 内使用,也可以单独使用。这里是已经集成到主线的部分:
ubuntu@linux-lab:/labs/linux-lab$ cat .gitmodules  | grep qemu-
url = https://gitee.com/tinylab/qemu-aarch64-raspi3/
url = https://gitee.com/tinylab/qemu-aarch64-virt.git
url = https://gitee.com/tinylab/qemu-arm-versatilepb.git
url = https://gitee.com/tinylab/qemu-arm-vexpress-a9.git
url = https://gitee.com/tinylab/qemu-i386-pc.git
url = https://gitee.com/tinylab/qemu-mipsel-malta.git
url = https://gitee.com/tinylab/qemu-ppc-g3beige.git
url = https://gitee.com/tinylab/qemu-riscv32-virt.git
url = https://gitee.com/tinylab/qemu-riscv64-virt.git
url = https://gitee.com/tinylab/qemu-x86_64-pc.git
url = https://gitee.com/tinylab/qemu-arm-mcimx6ul-evk.git
任选一块板子立即启动
如果要使用模块板子,可以直接:
$ make BOARD=aarch64/virt
$ make boot
sudo env PATH=/labs/linux-lab/boards/aarch64/virt/bsp/qemu/v4.0.0/bin/:/usr/local/sbin:/usr/local/bin:/usr/sbin:/usr/bin:/sbin:/bin  qemu-system-aarch64  -M virt -m 1024M -net nic,model=virtio -net tap -device virtio-net-device,netdev=net0,mac=30:d7:8a:81:bc:8a -netdev tap,id=net0 -smp 2 -bios /labs/linux-lab/output/aarch64/uboot-v2019.10-virt/u-boot.bin -no-reboot  -device loader,file=tftpboot/env.img,addr=0x49000000 -drive if=pflash,file=tftpboot/pflash.img,format=raw,unit=1 -drive if=none,file=/labs/linux-lab/boards/aarch64/virt/bsp/root/2019.11.1/rootfs.ext2,format=raw,id=virtio-vda -device virtio-blk-device,drive=virtio-vda -nographic -cpu cortex-a57 -serial mon:stdio -machine virt,gic_version=3 -machine type=virt,virtualization=true -d guest_errors -nodefaults

U-Boot 2019.10-dirty (May 10 2020 - 23:59:50 +0800)

DRAM:  1 GiB
Flash: 128 MiB
*** Warning - bad CRC, using default environment

In:    pl011@9000000
Out:   pl011@9000000
Err:   pl011@9000000
Net:
Warning: virtio-net#31 using MAC address from ROM
eth0: virtio-net#31
Hit any key to stop autoboot:  0
## Warning: defaulting to text format
## Flattened Device Tree blob at 44000000
   Booting using the fdt blob at 0x44000000
   Loading Device Tree to 000000007edf3000, end 000000007edf7c95 ... OK

Starting kernel ...

Booting Linux on physical CPU 0x0000000000 [0x411fd070]
Linux version 5.1.0 (ubuntu@linux-lab) (gcc version 7.4.1 20181213 [linaro-7.4-2019.02 revision 56ec6f6b99cc167ff0c2f8e1a2eed33b1edc85d4] (Linaro GCC 7.4-2019.02)) #1 SMP Wed May 6 03:15:08 CST 2020
Machine model: linux,dummy-virt
earlycon: pl11 at MMIO 0x0000000009000000 (options '')
printk: bootconsole [pl11] enabled
efi: Getting EFI parameters from FDT:
efi: UEFI not found.
psci: probing for conduit method from DT.
psci: PSCIv0.2 detected in firmware.
psci: Using standard PSCI v0.2 function IDs
psci: Trusted OS migration not required
random: get_random_bytes called from start_kernel+0xa8/0x4b4 with crng_init=0
percpu: Embedded 23 pages/cpu s55000 r8192 d31016 u94208
Detected PIPT I-cache on CPU0
CPU features: detected: ARM erratum 832075
CPU features: detected: GIC system register CPU interface
CPU features: detected: EL2 vector hardening
Built 1 zonelists, mobility grouping on.  Total pages: 258048
Kernel command line: route=172.17.0.3 iface=eth0 rw fsck.repair=yes rootwait root=/dev/vda earlycon console=ttyAMA0
Dentry cache hash table entries: 131072 (order: 8, 1048576 bytes)
Inode-cache hash table entries: 65536 (order: 7, 524288 bytes)
Memory: 1018660K/1048576K available (6140K kernel code, 790K rwdata, 1472K rodata, 832K init, 335K bss, 29916K reserved, 0K cma-reserved)
SLUB: HWalign=64, Order=0-3, MinObjects=0, CPUs=2, Nodes=1
rcu: Hierarchical RCU implementation.
rcu: 	RCU event tracing is enabled.
rcu: 	RCU restricting CPUs from NR_CPUS=256 to nr_cpu_ids=2.
rcu: RCU calculated value of scheduler-enlistment delay is 25 jiffies.
rcu: Adjusting geometry for rcu_fanout_leaf=16, nr_cpu_ids=2
NR_IRQS: 64, nr_irqs: 64, preallocated irqs: 0
GICv3: GIC: Using split EOI/Deactivate mode
GICv3: Distributor has no Range Selector support
GICv3: no VLPI support, no direct LPI support
GICv3: CPU0: found redistributor 0 region 0:0x00000000080a0000
arch_timer: cp15 timer(s) running at 62.50MHz (phys).
clocksource: arch_sys_counter: mask: 0xffffffffffffff max_cycles: 0x1cd42e208c, max_idle_ns: 881590405314 ns
sched_clock: 56 bits at 62MHz, resolution 16ns, wraps every 4398046511096ns
Console: colour dummy device 80x25
Calibrating delay loop (skipped), value calculated using timer frequency.. 125.00 BogoMIPS (lpj=250000)
pid_max: default: 32768 minimum: 301
Mount-cache hash table entries: 2048 (order: 2, 16384 bytes)
Mountpoint-cache hash table entries: 2048 (order: 2, 16384 bytes)
*** VALIDATE proc ***
*** VALIDATE cgroup1 ***
*** VALIDATE cgroup2 ***
ASID allocator initialised with 32768 entries
rcu: Hierarchical SRCU implementation.
EFI services will not be available.
smp: Bringing up secondary CPUs ...
Detected PIPT I-cache on CPU1
GICv3: CPU1: found redistributor 1 region 0:0x00000000080c0000
CPU1: Booted secondary processor 0x0000000001 [0x411fd070]
smp: Brought up 1 node, 2 CPUs
SMP: Total of 2 processors activated.
CPU features: detected: 32-bit EL0 Support
CPU features: detected: CRC32 instructions
CPU: All CPU(s) started at EL2
alternatives: patching kernel code
devtmpfs: initialized
clocksource: jiffies: mask: 0xffffffff max_cycles: 0xffffffff, max_idle_ns: 7645041785100000 ns
futex hash table entries: 512 (order: 3, 32768 bytes)
DMI not present or invalid.
NET: Registered protocol family 16
vdso: 2 pages (1 code @ (____ptrval____), 1 data @ (____ptrval____))
hw-breakpoint: found 6 breakpoint and 4 watchpoint registers.
DMA: preallocated 256 KiB pool for atomic allocations
Serial: AMBA PL011 UART driver
9000000.pl011: ttyAMA0 at MMIO 0x9000000 (irq = 40, base_baud = 0) is a PL011 rev1
printk: console [ttyAMA0] enabled
printk: console [ttyAMA0] enabled
printk: bootconsole [pl11] disabled
printk: bootconsole [pl11] disabled
SCSI subsystem initialized
clocksource: Switched to clocksource arch_sys_counter
NET: Registered protocol family 2
tcp_listen_portaddr_hash hash table entries: 512 (order: 1, 8192 bytes)
TCP established hash table entries: 8192 (order: 4, 65536 bytes)
TCP bind hash table entries: 8192 (order: 5, 131072 bytes)
TCP: Hash tables configured (established 8192 bind 8192)
UDP hash table entries: 512 (order: 2, 16384 bytes)
UDP-Lite hash table entries: 512 (order: 2, 16384 bytes)
NET: Registered protocol family 1
RPC: Registered named UNIX socket transport module.
RPC: Registered udp transport module.
RPC: Registered tcp transport module.
RPC: Registered tcp NFSv4.1 backchannel transport module.
hw perfevents: enabled with armv8_pmuv3 PMU driver, 5 counters available
workingset: timestamp_bits=62 max_order=18 bucket_order=0
NFS: Registering the id_resolver key type
Key type id_resolver registered
Key type id_legacy registered
9p: Installing v9fs 9p2000 file system support
Block layer SCSI generic (bsg) driver version 0.4 loaded (major 252)
io scheduler mq-deadline registered
io scheduler kyber registered
cacheinfo: Unable to detect cache hierarchy for CPU 0
virtio_blk virtio0: [vda] 14336 512-byte logical blocks (7.34 MB/7.00 MiB)
NET: Registered protocol family 10
Segment Routing with IPv6
sit: IPv6, IPv4 and MPLS over IPv4 tunneling driver
NET: Registered protocol family 17
NET: Registered protocol family 15
9pnet: Installing 9P2000 support
Key type dns_resolver registered
registered taskstats version 1
hctosys: unable to open rtc device (rtc0)
EXT4-fs (vda): mounting ext2 file system using the ext4 subsystem
EXT4-fs (vda): warning: mounting unchecked fs, running e2fsck is recommended
EXT4-fs (vda): mounted filesystem without journal. Opts: (null)
VFS: Mounted root (ext2 filesystem) on device 254:0.
devtmpfs: mounted
Freeing unused kernel memory: 832K
Run /sbin/init as init process
EXT4-fs (vda): re-mounted. Opts: block_validity,barrier,user_xattr
Starting syslogd: OK
Starting klogd: OK
Running sysctl: OK
Initializing random number generator: OK
Saving random seed: random: dd: uninitialized urandom read (512 bytes read)
OK
Starting network: eth: eth0, ip: 172.17.0.181, gw: 172.17.0.3
OK

Welcome to Linux Lab
linux-lab login: root
#
# reboot -f
所有默认准备好的文件系统帐号是 root,密码为空,直接敲击回车即可进去。大部分板子都可以用 reboot -f 退出,个别板子可能会卡死,可以用 “CTRL+a x” 退出 Qemu。
传统的 Qemu 启动脚本:boot.sh
当然,也可以直接用最简单易懂的 boot.sh 脚本,这个脚本甚至可以在主机下直接使用:
ubuntu@linux-lab:/labs/linux-lab$ cd boards/aarch64/virt/bsp/
ubuntu@linux-lab:/labs/linux-lab/boards/aarch64/virt/bsp$ ./boot.sh
Welcome to Linux Lab
linux-lab login: root
#
# reboot -f
不过,boot.sh 可没 “make boot” 灵活方便。比如说,想通过 tftp 加载镜像,并通过 nfsboot 加载文件系统,要用 boot.sh 得手动改一堆不是那么容易理解和上手的参数,特别地,要配置网络并没有那么简单。
无比优雅的 “make boot”
用 Linux Lab 的 “make boot” 是这么的优雅:
ubuntu@linux-lab:/labs/linux-lab$ make boot ROOTDEV=/dev/nfs BOOTDEV=tftp
Linux 内核开发
直接使用编译好的当然不够酷,得能自己修改内核并编译内核才行。
编译 Linux v5.6
假如我们想学习 x86_64 架构上的 Linux v5.6 内核,可以切到 x86_64/pc 这块板子,然后升级到内核 v5.6:
$ make BOARD=x86_64/pc
$ make kernel-clone LINUX_NEW=v5.6
$ make kernel-cleanup
$ make kernel
编译其他版本 Linux
如果想用默认的版本,则不需要使用 kernel-clone,查看已经验证过的内核版本。
$ make list linux
v3.2 v5.0.10 v5.0.21 [v5.1] v5.4 v5.4.29
$ make local-config LINUX=v5.4
v3.2 v5.0.10 v5.0.21 v5.1 [v5.4] v5.4.29
$ make kernel
需要注意的是,kernel-clone 会使用当前板子默认配置的内核配置文件,如果内核版本差异太大,现有配置文件可能不会工作,建议直接从 linux-stable 目录下复制一份现有配置到 boards/<BOARD>/bsp/configs 目录下。之后再配置和编译。
如果是更早的 Linux 版本,可能会涉及到编译器不兼容,需要修改部分代码或者调整编译器版本。
更换编译器版本
首先我们查看哪些版本可以用,包括内置的版本和外置的版本,内置的版本用 CCORI=internal 指定后,配置 GCC 即可,外部的直接指定 CCORI 进行切换。
查看当前架构支持的编译器,可以看到暂时没有配置外部的版本,但是内部的有三个:
$ make gcc-list

Listing prebuilt toolchain ...


[ internal gcc-8 ]:

Remote.:
Local..:
Tool...: gcc
Version: gcc (Ubuntu 8.3.0-16ubuntu3~14.04.2) 8.3.0
More...: /usr/bin/gcc-4.4 /usr/bin/gcc-4.8 /usr/bin/gcc-8
直接切换:
$ make gcc-switch GCC=4.4
或者更持久的配置:
$ make local-config GCC=4.4
如果要为某个版本配特定 GCC:
$ make local-config GCC[LINUX_v5.6]=8
查看记录:
$ make local-edit
LINUX := v5.6
GCC := 4.4
GCC[LINUX_v5.6] := 8
如果发现某个已经配置好的内核必须用特定 GCC 才能编译,请往 Linux Lab 发送 PR。
修改代码后编译启动
接着,随便改一点你想修改的代码,然后就可以重新编译并启动了:
$ git diff init/main.c
diff --git a/init/main.c b/init/main.c
index ee4947a..acd6c71 100644
--- a/init/main.c
+++ b/init/main.c
@@ -815,6 +815,7 @@ asmlinkage __visible void __init start_kernel(void)
        build_all_zonelists(NULL);
        page_alloc_init();

+       pr_info("Hello Linux\n");
        pr_notice("Kernel command line: %s\n", saved_command_line);
        /* parameters may set static keys */
        jump_label_init();

$ make kernel
$ make boot
...
Welcome to Linux Lab
linux-lab login: root
#
# dmesg | grep Hello
[    0.447766] Hello Linux
# reboot -f
[  107.481353] reboot: Restarting system
[  107.482477] reboot: machine restart
堪称完美,我们改动的地方生效了,日志被打印了出来。
单独编译某个文件并查看效果
比如说刚刚修改了 init/main.c,希望立即查看预处理的结果、汇编以及二进制文件。
预处理的结果:
$ make kernel-run init/main.i
$ grep Hello -ur output/x86_64/linux-v5.6-pc/init/main.i
 printk("\001" "6" "Hello Linux\n");
汇编:
$ make kernel-run init/main.s
$ grep -A5 -B1 Hello -ur output/x86_64/linux-v5.6-pc/init/main.s
.LC27:
	.string	"\0016Hello Linux\n"
.LC28:
	.string	"\0015Kernel command line: %s\n"
.LC29:
	.string	"Booting kernel"
.LC30:
--
	call	page_alloc_init	#
# /labs/linux-lab/linux-stable/init/main.c:818: 	pr_info("Hello Linux\n");
	movq	$.LC27, %rdi	#,
	call	printk	#
# /labs/linux-lab/linux-stable/init/main.c:819: 	pr_notice("Kernel command line: %s\n", saved_command_line);
	movq	saved_command_line(%rip), %rsi	# saved_command_line,
	movq	$.LC28, %rdi	#,
目标文件:
$ make kernel-run init/main.o
$ ls output/x86_64/linux-v5.6-pc/init/main.o
Linux 内核模块开发
要学习和开发一个 Linux 内核模块是如此的简单。
编译一个准备好的 hello 模块
在 examples/hello 下面已经准备了一个极其简单的内核模块,直接编译:
$ make module module=hello

Building module: hello ...

LOG: m=hello ; M=/labs/linux-lab/modules/hello

  Current using module is /labs/linux-lab/modules/hello.
  to compile modules under linux-stable, use 'make kernel-modules'.

make O=/labs/linux-lab/output/x86_64/linux-v5.6-pc -C linux-stable ARCH=x86 LOADADDR= CROSS_COMPILE= V=  CONFIG_INITRAMFS_SOURCE= -j4 modules_prepare
  GEN     Makefile
  DESCEND  objtool
  CALL    /labs/linux-lab/linux-stable/scripts/atomic/check-atomics.sh
  CALL    /labs/linux-lab/linux-stable/scripts/checksyscalls.sh
  CC [M]  /labs/linux-lab/modules/hello/hello.o
  MODPOST 1 modules
  CC [M]  /labs/linux-lab/modules/hello/hello.mod.o
  LD [M]  /labs/linux-lab/modules/hello/hello.ko
修改、编译并简单测试该模块
修改:
ubuntu@linux-lab:/labs/linux-lab$ git diff modules/hello/
diff --git a/modules/hello/hello.c b/modules/hello/hello.c
index 59f1c55..2321857 100644
--- a/modules/hello/hello.c
+++ b/modules/hello/hello.c
@@ -4,14 +4,14 @@

 static int __init my_hello_init(void)
 {
-       pr_info("hello module init\n");
+       pr_info("mymodule init\n");

        return 0;
 }

 static void __exit my_hello_exit(void)
 {
-       pr_info("hello module exit\n");
+       pr_info("mymodule exit\n");
 }

 module_init(my_hello_init);
编译:
ubuntu@linux-lab:/labs/linux-lab$ make module module=hello
启动后简单验证:
ubuntu@linux-lab:/labs/linux-lab$ make module-install module=hello
ubuntu@linux-lab:/labs/linux-lab$ make root-rebuild

Welcome to Linux Lab
linux-lab login: root
#
# modprobe hello
[   15.777975] hello: loading out-of-tree module taints kernel.
[   15.811822] mymodule init
#
# modprobe -r hello
[   27.279818] mymodule exit
# reboot -f
[   37.218398] reboot: Restarting system
[   37.218612] reboot: machine restart
自动验证(无需手动安装,直接取代上述所有命令):
ubuntu@linux-lab:/labs/linux-lab$ make test module=hello ROOTDEV=/dev/ram0
如果有些动作做过了,想直接测试,更简单:
ubuntu@linux-lab:/labs/linux-lab$ make test module=hello ROOTDEV=/dev/ram0 FEATURE_INIT=0
Linux 内核特性开发
先列出当前已经验证过的 feature:
ubuntu@linux-lab:/labs/linux-lab$ make list features
[ feature/linux ]:
  + 9pnet
    - config
    - config.aarch64.virt.broken
    - config.pc
    - config.versatilepb
  + cmdline_size
    - patch.sh
    - README.md
  + core
    - debug
      * config
    - initrd
      * config
    - module
      * config
    - nfsroot
      * config
      * README.md
  + ftrace
    - v2.6.36
      * config
      * env.g3beige
      * env.malta
      * env.pc
      * env.versatilepb
    - v2.6.37
      * config
      * env.g3beige
  + gcs
    - v2.6.36
      * config
      * env.g3beige
      * env.malta
      * env.pc
      * env.versatilepb
      * patch
  + kft
    - v2.6.36
      * config
      * config.pc
      * env.malta
      * env.pc
      * patch
  + rt
    - config
    - v5.0.21
      * download.sh
      * patch-5.0.21-rt16.patch
      * patch-5.0.21-rt16.patch.xz
    - v5.2
      * download.sh
      * patch-5.2-rt1.patch
      * patch-5.2-rt1.patch.gz
  + uksm
    - v2.6.38
      * config
      * patch
      * version
接着来跑一下 rt preempt 特性:
ubuntu@linux-lab:/labs/linux-lab$ make BOARD=x86_64/pc
ubuntu@linux-lab:/labs/linux-lab$ make local-config LINUX=v5.0.21

ubuntu@linux-lab:/labs/linux-lab$ make kernel-cleanup
ubuntu@linux-lab:/labs/linux-lab$ make kernel-defconfig
ubuntu@linux-lab:/labs/linux-lab$ make feature feature=rt
ubuntu@linux-lab:/labs/linux-lab$ make kernel-olddefconfig
ubuntu@linux-lab:/labs/linux-lab$ make kernel

ubuntu@linux-lab:/labs/linux-lab$ make boot
[   26.744772] 001: Run /init as init process
Starting syslogd: OK
Starting klogd: OK
Initializing random number generator... [   31.520793] 001: random: dd: uninitialized urandom read (512 bytes read)
done.
Starting network: [   36.352869] 002: ifconfig (1146) used greatest stack depth: 13904 bytes left
eth: eth0, ip: 172.17.0.61, gw: 172.17.0.3
[   37.091929] 001: ip (1150) used greatest stack depth: 13600 bytes left
OK


Welcome to Linux Lab
linux-lab login: root
#
# dmesg | grep -i Preempt
[    0.000000] 000: Linux version 5.0.21-rt16+ (ubuntu@linux-lab) (gcc version 8.3.0 (Ubuntu 8.3.0-16ubuntu3~14.04.2)) #2 SMP PREEMPT RT Fri May 15 04:38:39 CST 2020
[    3.539891] 000: rcu: Preemptible hierarchical RCU implementation.
Uboot 开发
支持 Uboot 的板子
当前已经验证可以在 arm32 和 arm64 位的板子上进行 Uboot 开发。已经验证过的板子有:
- arm/versatilepb
- arm/vexpress-a9
- aarh64/virt
启动时禁用 Uboot
默认情况下,会直接启动 Uboot,然后加载内核再启动。
如果想直接启动内核:
ubuntu@linux-lab:/labs/linux-lab$ make BOARD=arm/vexpress-a9
ubuntu@linux-lab:/labs/linux-lab$ make boot U=0
启动时切换不同的设备加载内核等镜像
ubuntu@linux-lab:/labs/linux-lab$ make list bootdev
tftp sdcard sd mmc [flash] pflash

ubuntu@linux-lab:/labs/linux-lab$ make boot BOOTDEV=mmc
mkfs.fat 3.0.26 (2014-03-07)
sudo env PATH=/labs/linux-lab/boards/arm/vexpress-a9/bsp/qemu/v4.1.1/bin/:/usr/local/sbin:/usr/local/bin:/usr/sbin:/usr/bin:/sbin:/bin  qemu-system-arm  -M vexpress-a9 -m 1024M -net nic,model=lan9118 -net tap -smp 1 -kernel /labs/linux-lab/output/arm/uboot-v2020.04-vexpress-a9/u-boot -no-reboot  -drive if=sd,file=tftpboot/sd.img,format=raw,id=sd0 -drive if=pflash,file=tftpboot/pflash.img,format=raw -nographic

U-Boot 2020.04-dirty (May 06 2020 - 16:19:09 +0800)

DRAM:  1 GiB
WARNING: Caches not enabled
Flash: 128 MiB
MMC:   MMC: 0
*** Warning - bad CRC, using default environment

In:    serial
Out:   serial
Err:   serial
Net:   smc911x-0
Hit any key to stop autoboot:  0
## Warning: defaulting to text format
4471936 bytes read in 1360 ms (3.1 MiB/s)
1430238 bytes read in 442 ms (3.1 MiB/s)
14087 bytes read in 22 ms (625 KiB/s)
## Booting kernel from Legacy Image at 60003000 ...
   Image Name:   Linux-5.1.0
   Image Type:   ARM Linux Kernel Image (uncompressed)
   Data Size:    4471872 Bytes = 4.3 MiB
   Load Address: 60003000
   Entry Point:  60003000
   Verifying Checksum ... OK
## Loading init Ramdisk from Legacy Image at 60900000 ...
   Image Name:
   Image Type:   ARM Linux RAMDisk Image (uncompressed)
   Data Size:    1430174 Bytes = 1.4 MiB
   Load Address: 00000000
   Entry Point:  00000000
   Verifying Checksum ... OK
## Flattened Device Tree blob at 60500000
   Booting using the fdt blob at 0x60500000
   Loading Kernel Image
   Loading Ramdisk to 7fd18000, end 7fe7529e ... OK
   Loading Device Tree to 7fd11000, end 7fd17706 ... OK

Starting kernel ...

Booting Linux on physical CPU 0x0
Linux version 5.1.0 (ubuntu@524b6f3a0481) (gcc version 4.7.3 (Ubuntu/Linaro 4.7.3-12ubuntu1)) #3 SMP Thu May 30 08:44:37 UTC 2019
CPU: ARMv7 Processor [410fc090] revision 0 (ARMv7), cr=10c5387d
CPU: PIPT / VIPT nonaliasing data cache, VIPT nonaliasing instruction cache
...
修改、编译并启动 Uboot
默认先编译一遍,会自动下载、配置和编译:
ubuntu@linux-lab:/labs/linux-lab$ make uboot
修改代码:
ubuntu@linux-lab:/labs/linux-lab$ cd u-boot
ubuntu@linux-lab:/labs/linux-lab$ git diff
diff --git a/common/main.c b/common/main.c
index 3a657c3..cd32bc5 100644
--- a/common/main.c
+++ b/common/main.c
@@ -48,6 +48,8 @@ void main_loop(void)

        cli_init();

+       printf("Hello Uboot\n");
+
        if (IS_ENABLED(CONFIG_USE_PREBOOT))
                run_preboot_environment_command();
编译并启动,启动过程中立即按下任意键进入 Uboot 命令行:
ubuntu@linux-lab:/labs/linux-lab$ make boot
sudo env PATH=/labs/linux-lab/boards/arm/vexpress-a9/bsp/qemu/v4.1.1/bin/:/usr/local/sbin:/usr/local/bin:/usr/sbin:/usr/bin:/sbin:/bin  qemu-system-arm  -M vexpress-a9 -m 1024M -net nic,model=lan9118 -net tap -smp 1 -kernel /labs/linux-lab/output/arm/uboot-v2020.04-vexpress-a9/u-boot -no-reboot  -drive if=pflash,file=tftpboot/pflash.img,format=raw -nographic


U-Boot 2020.04-dirty (May 15 2020 - 02:46:50 +0800)

DRAM:  1 GiB
WARNING: Caches not enabled
Flash: 128 MiB
MMC:   MMC: 0
*** Warning - bad CRC, using default environment

In:    serial
Out:   serial
Err:   serial
Net:   smc911x-0
Hello Uboot                           <--  这里有打印我们添加的字符串
Hit any key to stop autoboot:  0
=>
=> reset
resetting ...
玩转文件系统
通过 Buildroot 构建文件系统
目前已经内置支持通过 Buildroot 编译文件系统,当然,也可以用 Busybox 来自己制作。
比如说 aarch64/virt,已经支持到 2019.11.1,可以直接切过去编译:
ubuntu@linux-lab:/labs/linux-lab$ make BOARD=aarch64/virt
ubuntu@linux-lab:/labs/linux-lab$ make list root
[2016.05] 2019.11.1
ubuntu@linux-lab:/labs/linux-lab$ make local-config BUILDROOT=2019.11.1
tools/board/config.sh BUILDROOT=2019.11.1 /labs/linux-lab/boards/arm/vexpress-a9/.labconfig v5.1;
BUILDROOT := 2019.11.1 /labs/linux-lab/boards/arm/vexpress-a9/.labconfig
ubuntu@linux-lab:/labs/linux-lab$ make list root
2016.05 [2019.11.1]
ubuntu@linux-lab:/labs/linux-lab$ make root
调整配置:
ubuntu@linux-lab:/labs/linux-lab$ make root-menuconfig
调整 Busybox 配置:
ubuntu@linux-lab:/labs/linux-lab$ make root-run busybox-menuconfig
通过 Linux Lab 运行 mini Ubuntu
同样以 aarch64/virt 为例:
ubuntu@linux-lab:/labs/linux-lab$ make BOARD=aarch64/virt
下载一份 mini 版本的 Ubuntu:
$ mkdir tmp && cd tmp
$ wget -c https://rcn-ee.com/rootfs/eewiki/minfs/ubuntu-20.04-minimal-armhf-2020-05-10.tar.xz
$ tar Jxf ubuntu-20.04-minimal-armhf-2020-05-10.tar.xz
$ cd ubuntu-20.04-minimal-armhf-2020-05-10
$ mkdir rootfs
$ tar xf armhf-rootfs-ubuntu-focal.tar -C rootfs/
然后以 nfsboot 的方式加载,这里先来删除掉 root 的密码(当前 ubuntu 帐号密码无法登陆):
$ make boot ROOTDIR=$PWD/tmp/ubuntu-20.04-minimal-armhf-2020-05-10/rootfs/ ROOTDEV=/dev/nfs XKCLI="init=/bin/bash" U=0
root # passwd -d root
接着启动并用 root 登陆:
$ make boot ROOTDIR=$PWD/tmp/ubuntu-20.04-minimal-armhf-2020-05-10/rootfs/ ROOTDEV=/dev/nfs  U=0
...
Ubuntu 20.04 LTS arm ttyAMA0

default username:password is [ubuntu:temppwd]

arm login: root
Last login: Thu Jan  1 00:01:44 UTC 1970 on ttyAMA0

root@arm:~#
root@arm:~#
Uboot 和 Linux 调试
Uboot 调试
已经提前配置好了 gdb 调试脚本, 可以直接调试 Uboot。
开一个终端:
$ tools/docker/bash linux-lab
ubuntu@linux-lab:/labs/linux-lab$ make debug uboot
根据上一个提示,再开一个:
$ tools/docker/bash linux-lab
ubuntu@linux-lab:/labs/linux-lab$ env PATH=/labs/linux-lab/prebuilt/toolchains/aarch64/gcc-linaro-7.4.1-2019.02-x86_64_aarch64-linux-gnu/bin:/usr/local/sbin:/usr/local/bin:/usr/sbin:/usr/bin:/sbin:/bin aarch64-linux-gnu-gdb /labs/linux-lab/output/aarch64/uboot-v2019.10-virt/u-boot
(gdb)  bt
GNU gdb (Linaro_GDB-2019.02) 8.2.1.20190122-git
Reading symbols from /labs/linux-lab/output/aarch64/uboot-v2019.10-virt/u-boot...done.

Waiting for 1 secs...

Executing gdb commands in local .gdbinit ...  my own script

(gdb) target remote :1234
0xffffff80100876dc in ?? ()

(gdb) break _start
Breakpoint 1 at 0x0: file /labs/linux-lab/u-boot/arch/arm/cpu/armv8/start.S, line 31.

gdb bt
#0  0xffffff80100876dc in ?? ()
#1  0x0000000000000070 in save_boot_params_ret () at /labs/linux-lab/u-boot/arch/arm/cpu/armv8/start.S:117
Backtrace stopped: previous frame identical to this frame (corrupt stack?)
Linux 调试
也能类似直接调试内核:
ubuntu@linux-lab:/labs/linux-lab$ make debug kernel
如果没有打开调试选项:
ubuntu@linux-lab:/labs/linux-lab$ make feature feture=debug
ubuntu@linux-lab:/labs/linux-lab$ make kernel-olddefconfig
ubuntu@linux-lab:/labs/linux-lab$ make kernel
ubuntu@linux-lab:/labs/linux-lab$ make debug kernel
灵活多样的登陆方式
本地登陆
以上都是用 tools/docker/bash 在本地登陆,大部分实验都能开展,但是跟图形相关的,比如 LCD 显示这些,就需要 vnc 登陆。
$ sudo apt-get install -y vinagre
$ tools/docker/vnc linux-lab
LOG: VNC login information:

         VNC Clients: vinagre xvnc4viewer gvncviewer xtightvncviewer
          VNC Server: 172.17.0.3
     Normal Password: ******
   Viewonly Password: ******

Available VNC Clients:

     1	vinagre
     2	xvnc4viewer
     3	gvncviewer
     4	xtightvncviewer

LOG: Choose the vnc client: 1

 1	vinagre

LOG: Running 'vinagre --vnc-scale --geometry 800x600 172.17.0.3'
之后,vinagre 启动并弹出密码输入框,直接粘贴即可。
远程登陆
如果想在服务器上运行 Linux Lab,那么启动完,需要获取到服务器的外网 IP 地址,配置到 .host_name 即可。
webssh 登陆方式:
$ echo x.y.z.i > .host_name
$ tools/docker/webssh linux-lab
LOG: Please login via ssh client with:

    SSH_IP: 172.17.0.3
  SSH_PORT: 22
      User: ubuntu
  Password: ******
   Workdir: //labs/linux-lab

LOG: Or access via web browser:
  http://x.y.z.i:4433?ssh=ssh://ubuntu:******@172.17.0.3:22
webvnc 登陆方式:
$ tools/docker/webvnc linux-lab
Please login via VNC Client with:

          IP: 172.17.0.3
        User: 7827c9 (Only for noVNC)
    Password: ****** (Normal)
    Password: ****** (View)

Login for noVNC web client:

  * Normal: http://x.y.z.i:6080/?u=******&p=******
  *   View: http://x.y.z.i:6080/?r=************

Login for local VNC clients:

  *     IP: 172.17.0.3
  * Normal: ******
  *   View: ******

The Other Login methods:

  *   Bash: tools/docker/bash linux-lab
  *    SSH: tools/docker/ssh linux-lab
  * WebSSH: tools/docker/webssh linux-lab

Note: Please make sure network available outside and then replace 'localhost' with the external ip or domain name.
      Then 'echo $ip > .host_name' or 'echo $domain_name > .host_name'

Note: firefox, safari and edge work, but google chrome web browser is preferable.
猜你喜欢:
- 我要投稿:发表原创技术文章,收获福利、挚友与行业影响力
- 知识星球:独家 Linux 实战经验与技巧,订阅「Linux知识星球」
- 视频频道:泰晓学院,B 站,发布各类 Linux 视频课
- 开源小店:欢迎光临泰晓科技自营店,购物支持泰晓原创
- 技术交流:Linux 用户技术交流微信群,联系微信号:tinylab
| 支付宝打赏 ¥9.68元 | 微信打赏 ¥9.68元 | |
 |  请作者喝杯咖啡吧 |  |
Read Album:
- Linux Lab 发布 v0.7 正式版,新增 Linux Lab 实验盘,一分钟内即可开展内核实验
- Linux Lab 真盘开发日志(6):体验内存编译的用法和好处
- Linux Lab 真盘开发日志(5):体验透明压缩带来的可用容量翻倍效果
- Linux Lab 真盘开发日志(4):在台式机、笔记本和 macBook 上即插即用
- Linux Lab 真盘开发日志(3):在 Linux 下直接启动 Linux Lab Disk,当双系统使用